
I’ve always wanted to add an accent brick wall, and the basement seemed like the appropriate stage for it. This project was easy, affordable, quick, and required very little skill and the most basic tools – so, perfect for me!
To start, this wall had some confusing detail added by the previous owners – half of it was left blank (painted gray, of course) and the other half had this distressed wood paneling that was the backdrop for the television. This space is huge, over 16 feet long, and I knew we could make better use of it.

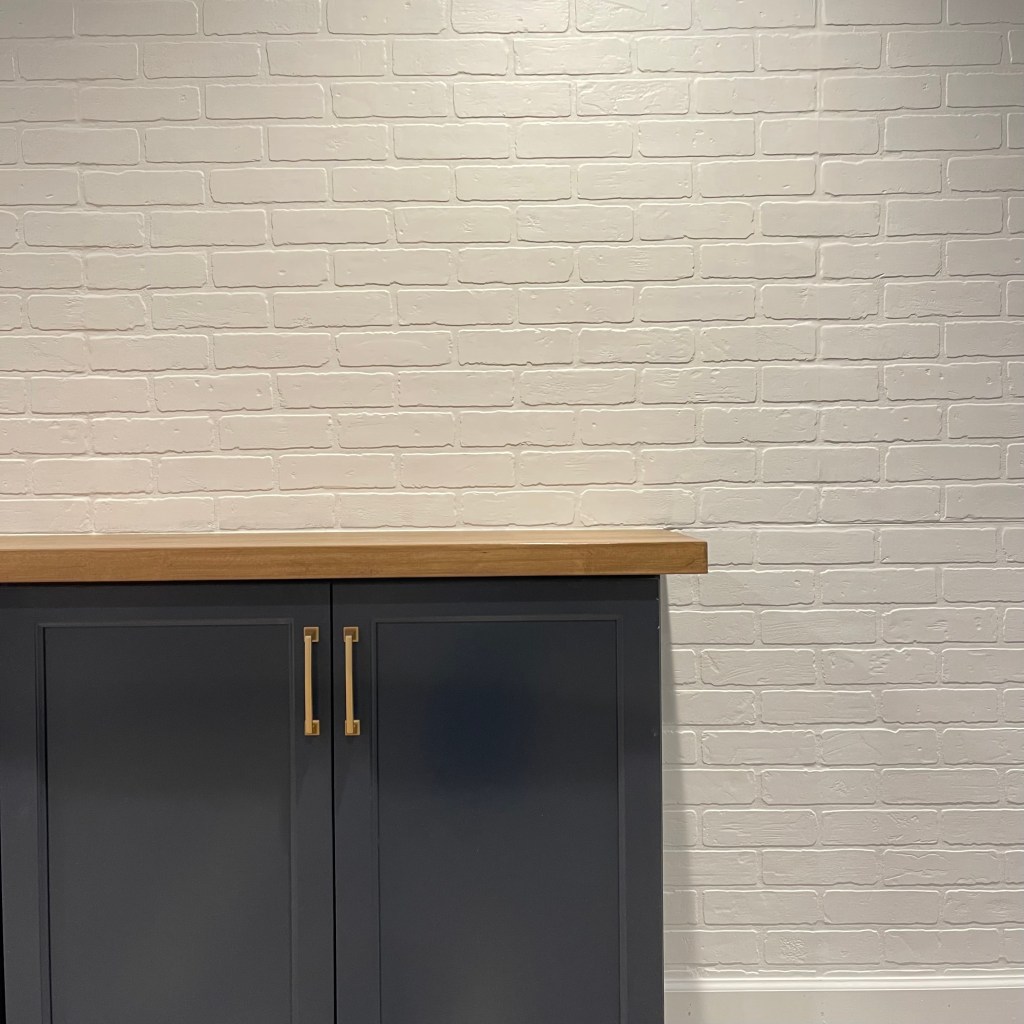
We started by removing all the wood, which left the wall looking like we’ve been throwing axes at it, with giant holes in the drywall and in desperate need of fixing up. I had cabinetry installed on the bottom, spanning the majority of the length of this space. These are upper cabinets you’d use in your kitchen, but I had them lined up on the bottom, providing tons of storage and creating a long cohesive look. I added a butcher block counter top to it, that I stained my favorite Minwax stain in Weathered Oak and sealed with top coat in satin finish. And now it was time for the faux brick!

I spotted these fake brick panels in Home Depot during one of my trips, and knew they would be perfect for this project. They are a think material, that can be cut with either a circular saw or a jigsaw for smaller detailed cuts, and the brick size and pattern was perfect for what I had in mind.
Materials needed:
- Faux brick panels
- Liquid nails and nail gun
- Circular saw and/or jig saw
- Joint compound and sanding blocks
- Primer
- Paint of choice
I started by attaching each panel to the wall with liquid nails and nail gun. The only part that might stomp you is lining up the pattern of the brick when the two panels come together. I counted the bricks where they were cut off and tried to match it that way. It’s similar to matching the pattern of wallpaper when you line it up, just takes a bit of practice, and by the second seam you know exactly how to handle it.
To cut around the counter, I used my jigsaw and followed the pattern of the brick again, attaching everything with the nail gun and liquid nails.

This is what it looked like when the panels were all up – like a pizza parlor! Trust the process thought, we are going to end up with fluffy, cloud-like, white, beautiful brick wall in the end.

To hide all the seams and to fill the nail holes, I used joint compound and let it dry completely before sanding it smooth. Don’t skip this step – this takes the project from looking ok to really making it look authentic and hides all the seams perfectly.
Next, I primed and painted everything, and this is what this wall looked like after two coats of paint: white, clean and crisp faux brick accent wall.

The whole process took three days with many interruptions, and I truly believe it is an easy beginner level project. I can see this being a beautiful accent in a laundry room, a backsplash in a pantry, or maybe even a bedroom accent wall!


I love the result and how it fits this space and I hope you give this a try!
